Creating Configurable and Portable SSIS Packages Part 2
In Part 1 I showed how a simple SSIS package could be created using variables and expressions as a basis for deployable configuration. When I first started working with SSIS I assumed naively that during deployment, a wizard or a configuration file would allow the variables and expressions to be readily editable. Speaking of which, how do you deploy an SSIS package? Let’s continue using the package we started in Part 1.
The mechanism I will use here is to right-click on the solution in the Solution Explorer and choose Properties…
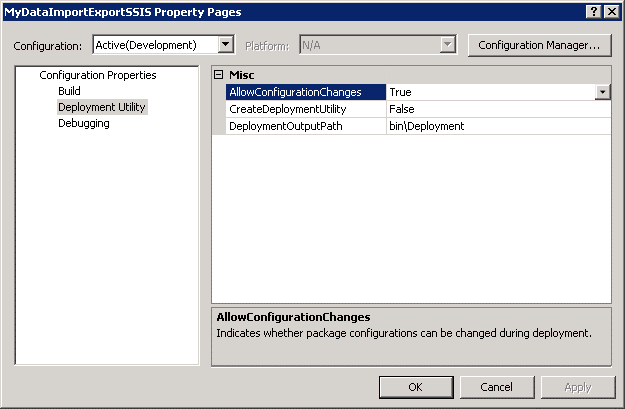
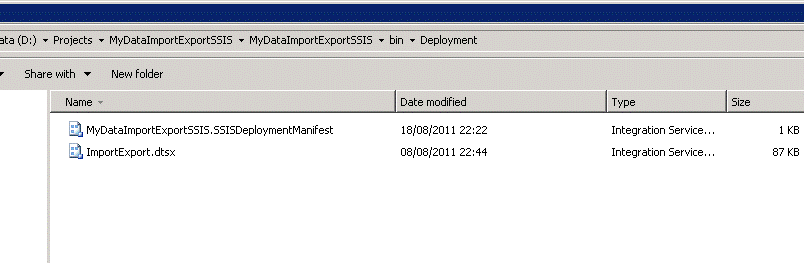
Set ‘Create Deployment Utility’ to True. This creates an installer for the package that can be copied and used to deploy the package to the target server. Click OK. Doing a build now produces an extra SSISDeploymentManifest as well as the package DTSX file inside a Deployment subfolder of Bin.
What can we do with these two files? For a start let’s try to run the package off the file system. Right click on ImportExport.dtsx and choose Open…. This opens the Execute Package Utility.
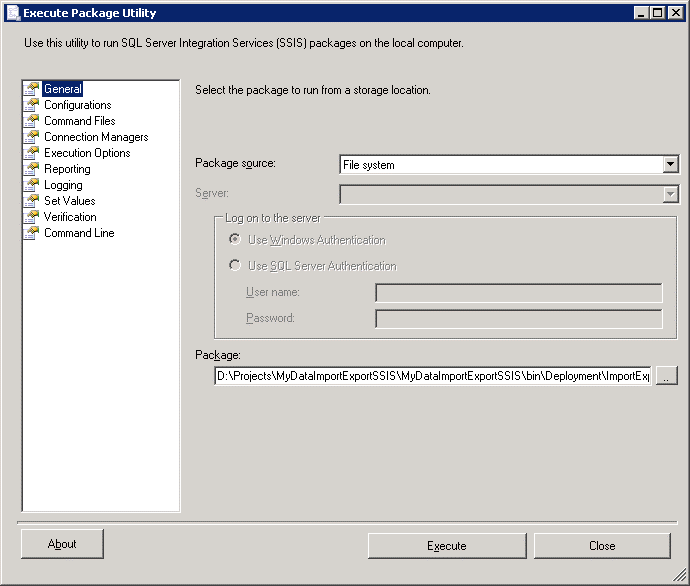
This shows the package source as ‘File system’ and the path of the package. Now click on Configurations. Note that this is blank, although you can (in theory) add configuration (.dtsconfig) files. It would be nice to have a configuration file with which we could specify the start values of our variables and other settings. For now however, we don’t.

Now click on Connection Managers
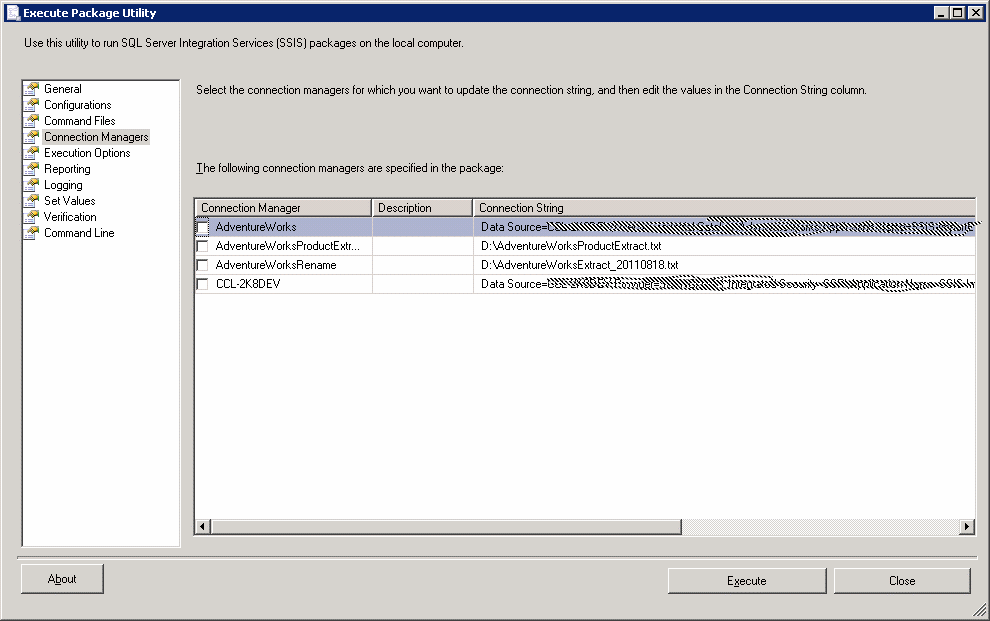
This is interesting because suddenly we can see a way to amend the values of our connections. So we could change the source of the extract for example or the name of the extract file. Note however that this could be risky if the logic of the package itself is expecting particular filenames. It’s also worth bearing in mind that changes made here are not persisted. If you make a change, then close the utility, you will find the values reverted to the original values the next time you open it. These values are hard-coded into the package. Don’t worry about that for now, the purpose of this article is to show how to un-hard-code the package. Now click Execution Options.
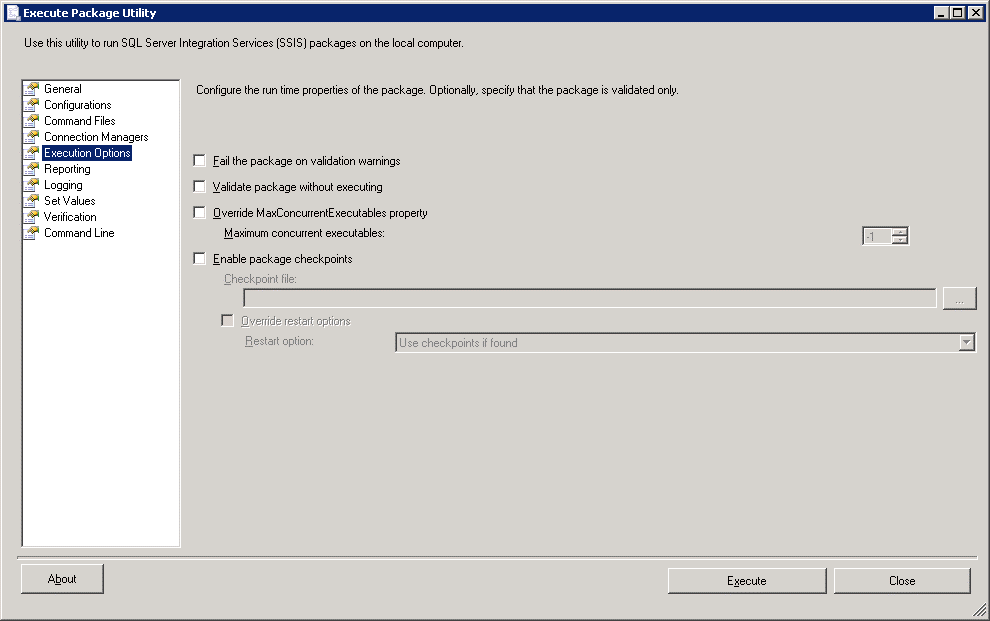
This screen allows the execution itself to be configured. We can for example, choose to validate the package without executing. This will check dependencies and the presence of suitable values for variables for example. The other pages of the utility are left to the reader to investigate. Now, on the Execution Options screen, check Fail the package on validation warnings and check Validate package without executing. Click Execute. After a few moments we get the execution screen, showing a successful validation: 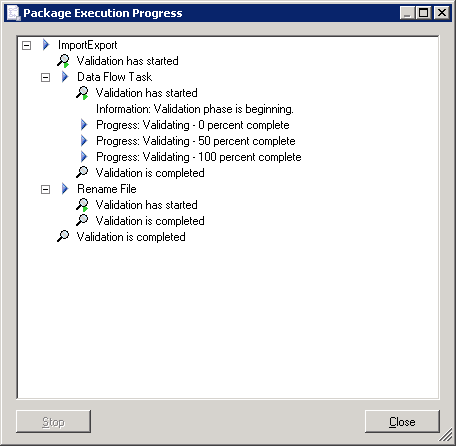
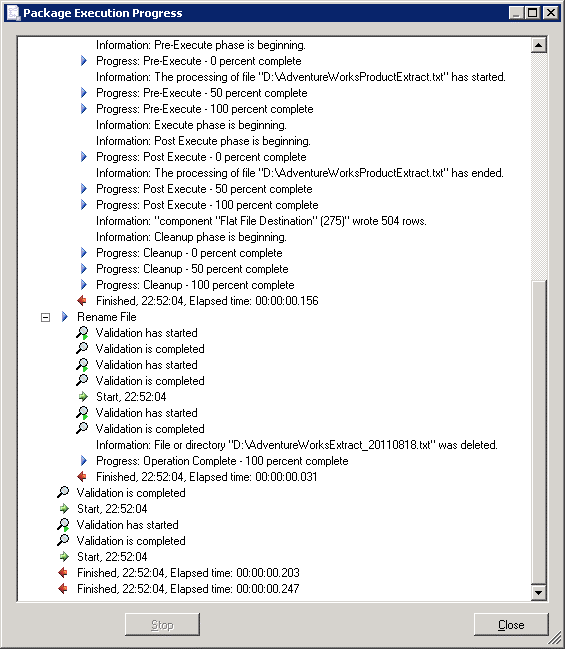
Click Close to return to the Execute Package Utility. Now uncheck the Validate package without executing checkbox. This time we’ll do a proper execution. What you may find is that the package will hang or fail immediately with an error saying that the package should be run as administrator. If that happens, close the execution window (or kill the process in Task Manager). Use the Start Menu to start the Execute Package Utility (it will be under SQL Server 2008, Integration Services) as Administrator. Change the Package source to File system, then load the package from the disk. This time the output should be better:
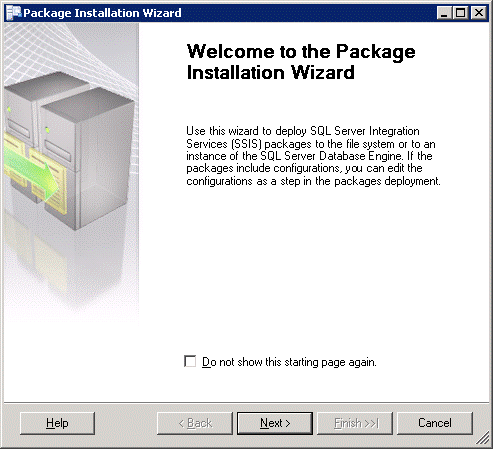
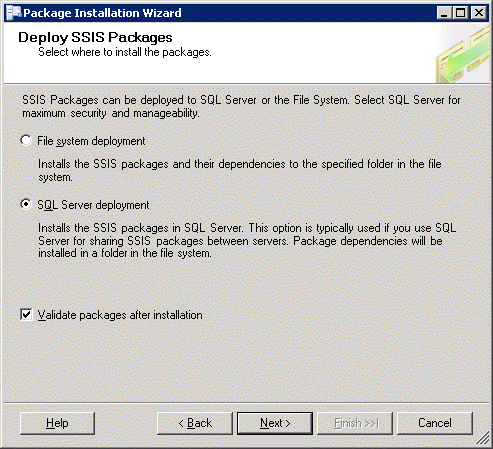
Click Close to return to the execute utility and click Close to close the utility as well. Right, so we now have a means to do ad-hoc package execution. What if we want to automate the package? Now we can of course use a CMD or batch file to call the package execution utility by command-line. Or we can use the SQL Agent. We can also choose whether to continue to run the package from the file system or save the package into SQL Server. The advantage of storing on the file system is that the files can be updated, copied to other locations etc. easily. The disadvantage is that the file is that the files need to be independently secured, backed up. Storing in MSDB means the package effectively becomes a record in the database and is secured and backed up as such. However, it is not as easily manipulated. If we go down the route of letting SQL Server manage the package execution, we need to import the package into Integration Services. This lets SSIS know about the name and location of the package (amongst other things). How do we do this? Remember that SSISDeploymentManifest file? Now is the time to right-click it and select Deploy. We now get the start of a deployment wizard:
Click Next. I am going to save the package into SQL Server because I don’t fancy managing all those files and working out backup strategies. I’m lazy that way.
Click Next.
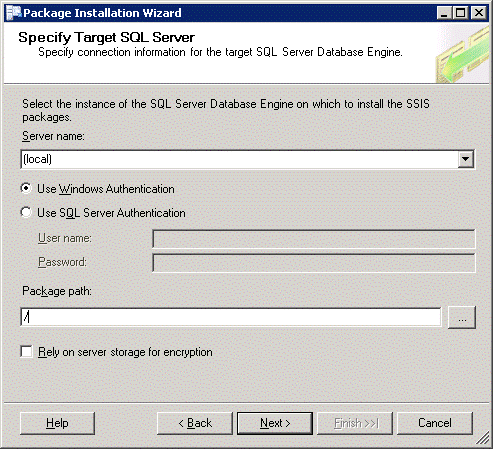
Select the correct server name and specify the appropriate credentials. When connected, click on the browse button to set the Package path. Yes, even though we are saving to SQL Server, we can specify a ‘virtual’ structure within SSIS to organise our packages. At this point we don’t have a structure yet, so just choose the root. Click Next.
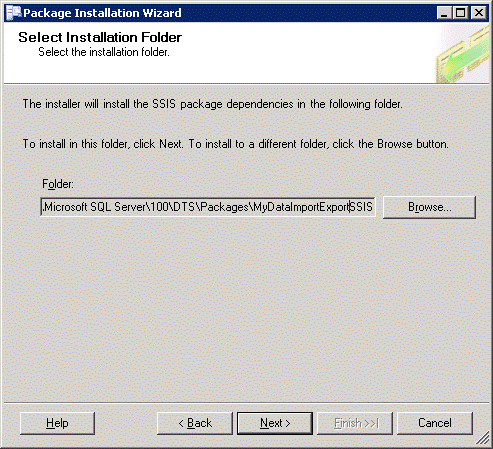
We can choose where SSIS saves the dependencies for this packages. Our simple package has no dependencies. For other packages it could be files or scripts that need to be invoked by the package. Click Next.
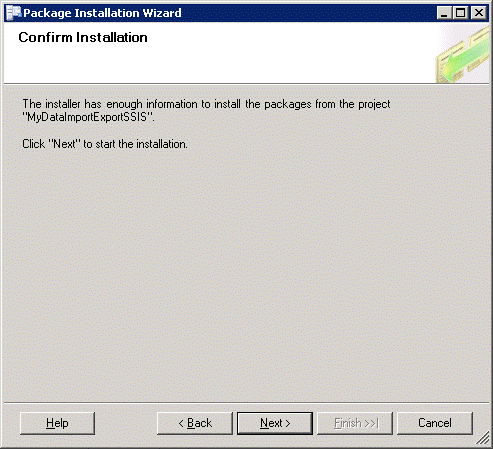
Click Next. This should install the package and start a package validation.
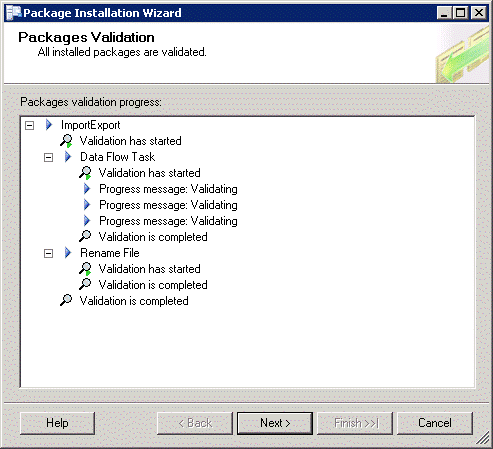
Click Next. This should display a summary of the installed package. Click Finish to close the wizard. Now open SQL Server Management Studio (SSMS) and connect to the server Integration Services. You should now see the package we just deployed. 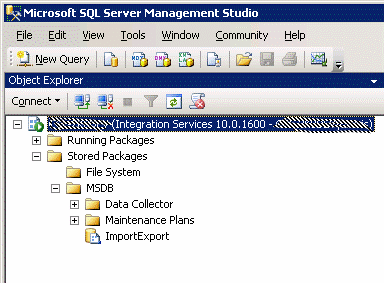
Now right click on the package and choose Run Package.
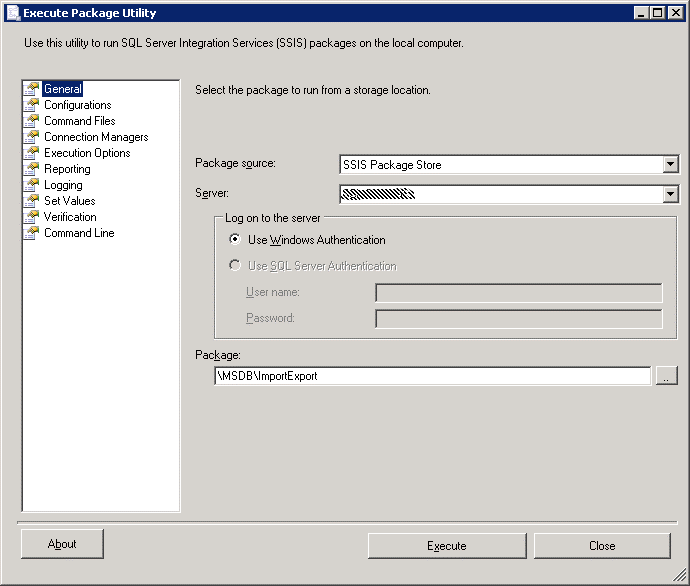
This is exactly the same utility as we were using earlier, but the source is now the SSIS Package Store (which is as far as I can tell, SQL Server). As before, go to the Execution Options and attempt to run the package. It should run successfully. I won’t cover it in this article (contact me if you want to know more!), but the package can now be used by a SQL Server Agent job to run on schedule. For the purpose of this exercise, I’ve deployed the package to the same server I was developing against. So all the connections and file paths matched. So let’s pretend that I need to change the location to which I’m extracting the files. This would be a common scenario when moving a package from development to testing or live. And just as common would be a change to the server name. How do I do this? Well it’s not obvious how you can do it. It is obvious that you can’t with the current package – we don’t have a configuration file and although we can change the connections in the execution utility, these will only work for ad-hoc executions. That feature is no use in the context of a SQL Agent job. The answer is to enable Configuration.
This opens the door to package portability and I’ll cover this in Part 3. And yes, I know this was supposed to be a two-part article. It's complicated.
 ASP.Net
 BlogEngine.NET
 Azure DevOps