Creating Configurable and Portable SSIS Packages Part 1
This is the first part of a two-part post about creating and deploying a simple SSIS package. When I first started this I was a complete novice as regards SSIS. I thought it was 'something like' DTS, which I had used quite frequently in SQL Server 2000. To make matters worse, I never actually got round to learning it even when given the opportunity with SQL Server 2005 - due to tight deadlines, I stuck with what I knew and simply created DTS legacy packages. This first part is a very simple introduction to creating a basic extract file using the sample AdventureWorks database. In the second part I’ll discuss the issues I found with my solution and how I worked around them to create a fully portable and configurable package. Hopefully someone will find this useful and a starting point for better and more complex packages.
Now the SSIS. I used SQL Server 2008 R2 Business Intelligence Development Studio, but you can also use Visual Studio 2008 (and possibly 2010 – although there was a time when this wasn’t the case). I created a solution containing my SSIS project, using File, New project. 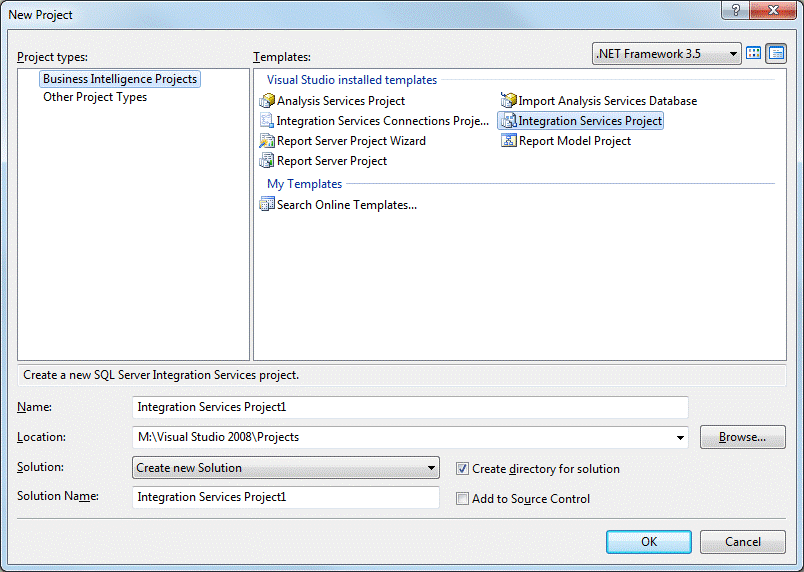
When the project has been created, the Control Flow design surface will be loaded and you can begin. If you want you can rename your default SSIS package at this point too – it might be better than calling it Package.dtsx for the rest of its life. 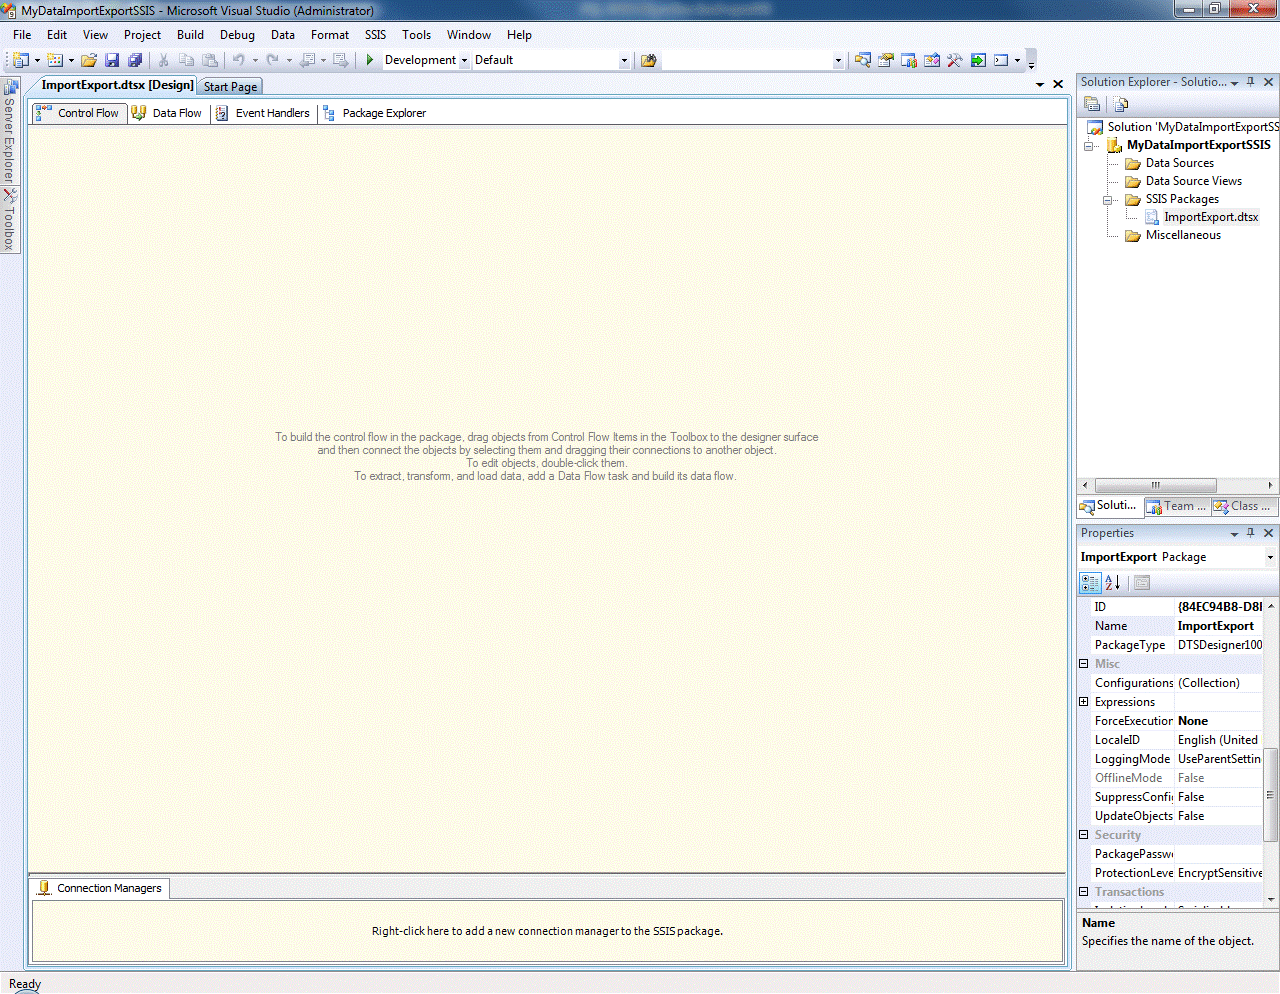
You can then use two methods to connect to the database. The first is to simply right click on the connections window, and follow the wizard. The second is to work with the design: drag a data flow task to the design surface, then create the connection it requires. I’ll use this method. 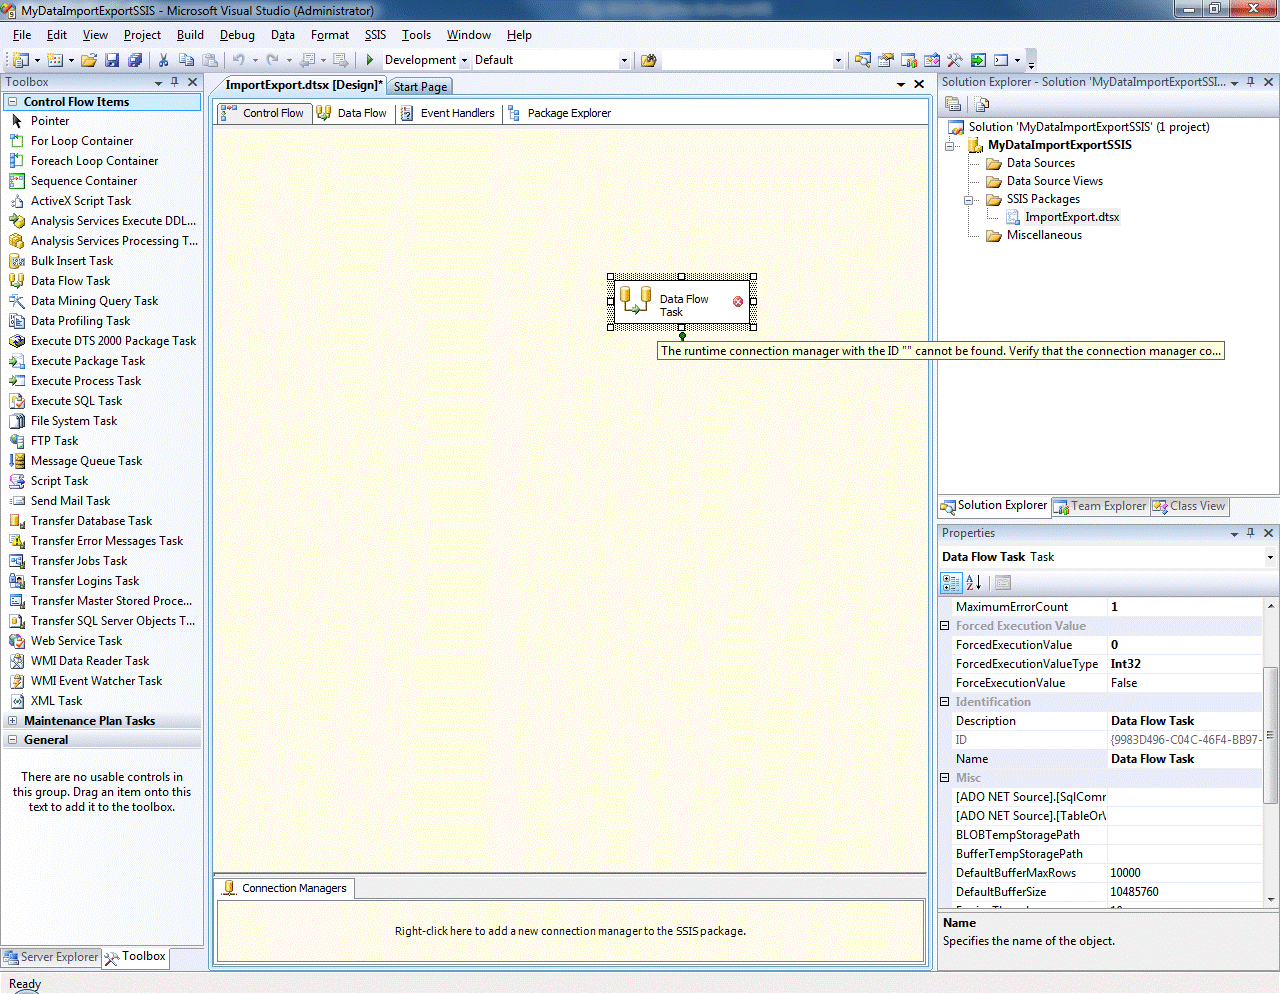
Double click on the task to change to the data flow designer. This is where you can set up the source and destination of the data flow task. Say we want to export some data from a database using an ADO.NET source. First we drag on our ADO.NET Source. Then we drag on a Flat File Destination. 
Notice the little red ‘cross’ icons in each of these blocks? That means that there is a problem – neither of these has a connection associated with it. So we’ll fix that. Double-click on the source. 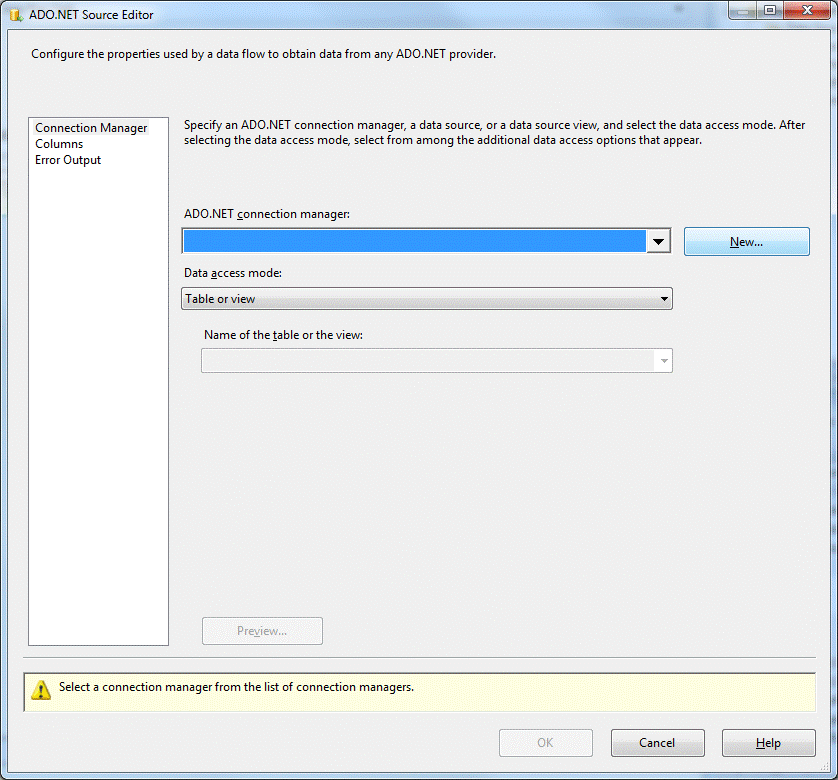
Guess what? We haven’t got anything in the list of ADO.NET connection managers. Not surprising really – we have to create one. Click New… 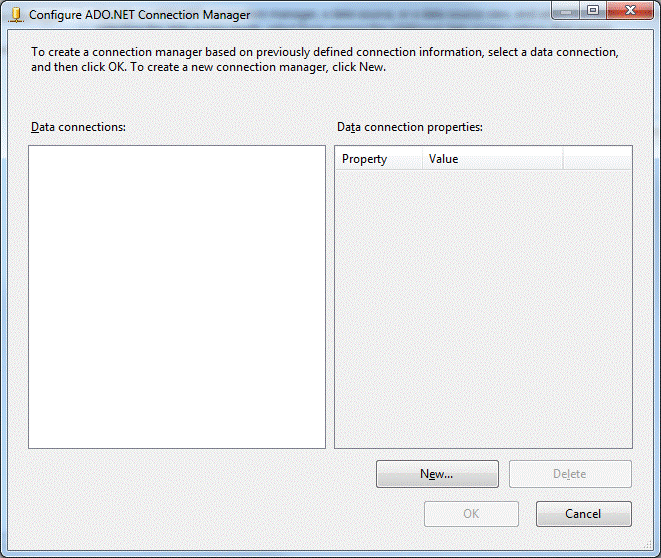
Following the wizard I ended up with a data control task 'Extract' using a source that I called 'AdventureWorks'. Now I double-click on the Flat File Destination. Yikes! 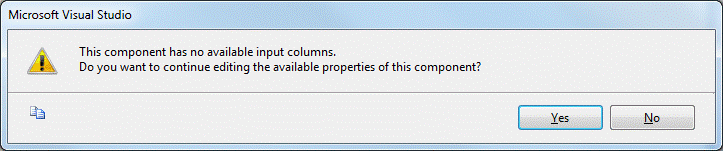
Click No. There is an easier way. Drag the GREEN arrow from your ADO NET Source and attach it to your destination. 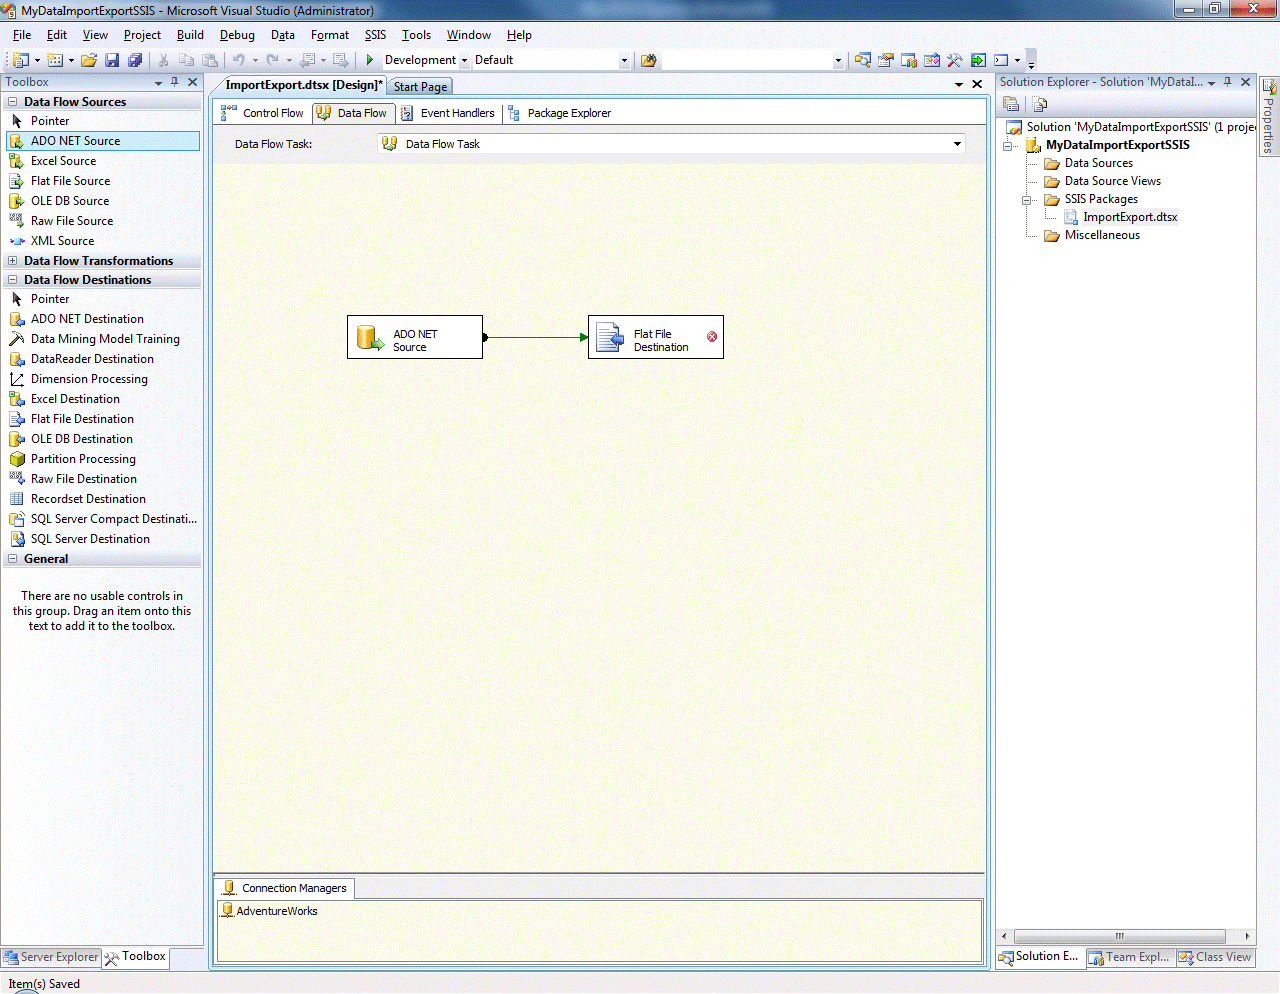
NOW double-click the destination. Result!
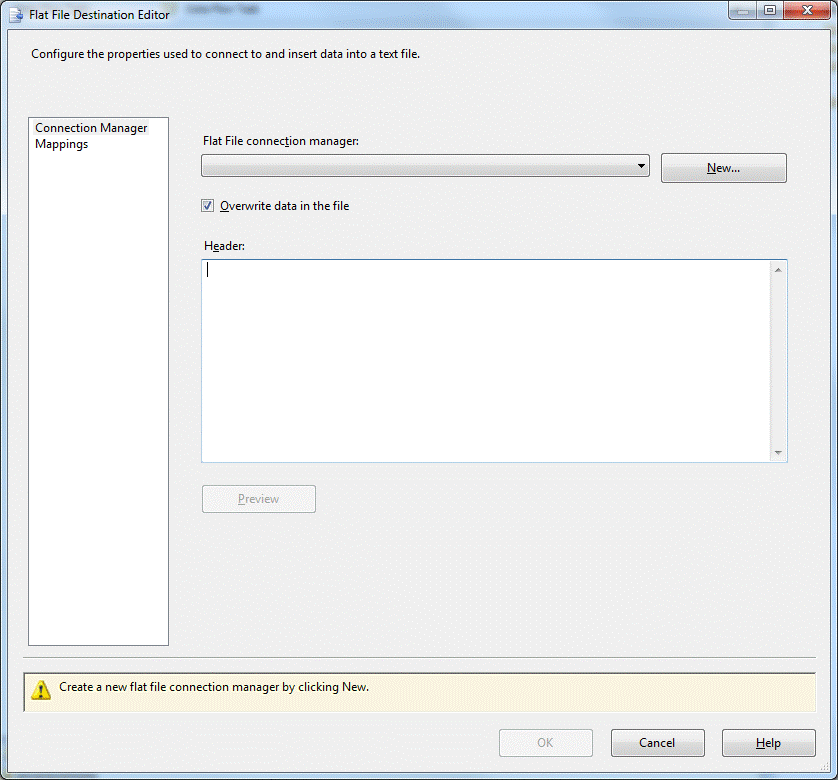
The Flat File also needs a connection manager. Click New…
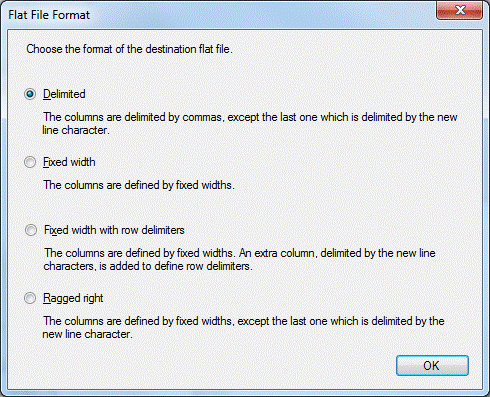
Choose a format – I’m sticking to Delimited.
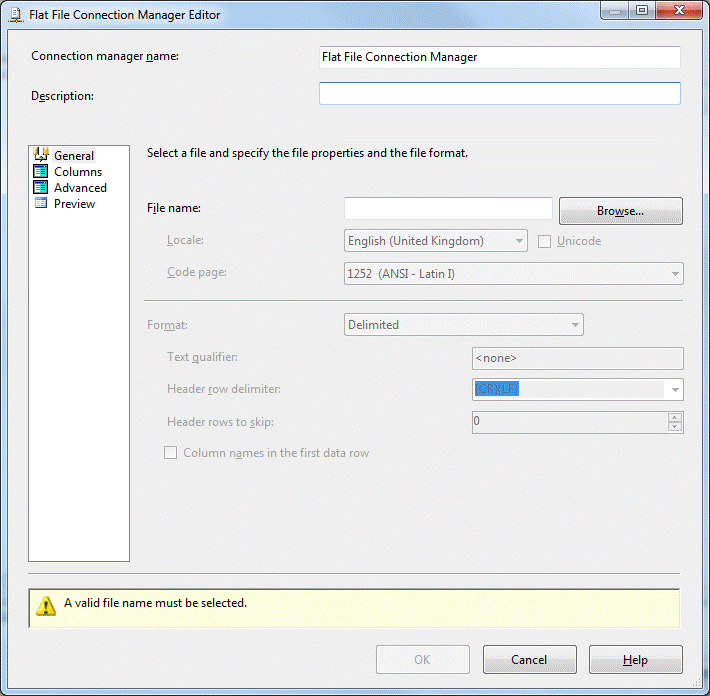
Give the connection manager a name – I’m choosing AdventureWorksExtract, and supply a filename. Clicking on the other items, Columns, Advanced, Preview shows that the column metadata has already been automatically mapped. Click OK. You can see the mappings now by clicking on Mappings on the Flat File Destination Editor. 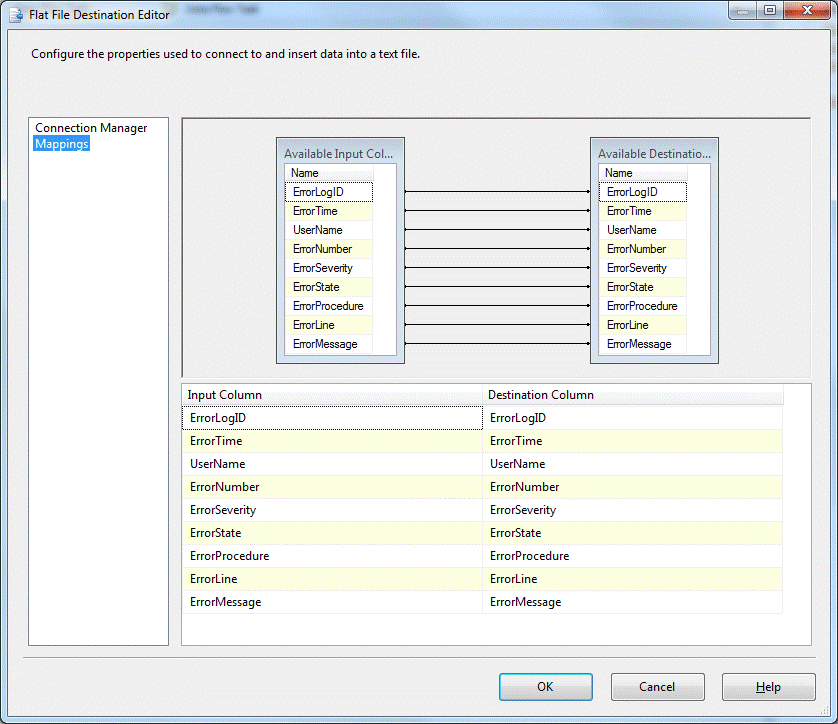
Of course, you can double click the link between the two tasks and thence edit the mappings manually. I found that this auto-mapping can throw up a few problems. In the initial stages I had to modify my view several times to cope with evolving requirements and in each case the mappings did not automatically update in the package. Perhaps that was expecting too much. I found that in order to regenerate the mappings automatically I had to delete the File connection manager and the destination file task, and recreate them as before. On a couple of occasions, I was given the option to refresh the mappings when SSIS detected that the underlying data schema had changed. I didn't get round to working out the exact circumstances under which this occurred. At this point, I was able to right click on Data Control task in the Control Flow view and choose “Execute task”. The file was created as expected. So we now have a working export. However there are some limitations. 1. The ADO.NET connection manager is hard coded to a particular server and login credentials 2. The file destination connection manager is hard coded to a particular file name and location. 3. If we want to create a different filename – say every day or on every run we can’t do it – the file will get overwritten every time the package executes. Let’s solve the second and third problems first – we can rename the file extracted so that a new one is always created. SSIS makes this really easy. We can also make the destination target readily configurable. The first thing we need to do is actually to make our output folder a variable.
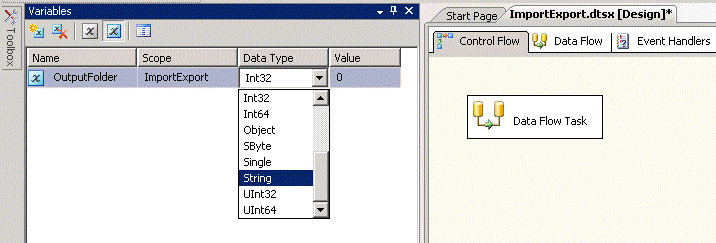
We do this by right-clicking on the Control Flow surface and choosing ‘Variables’ 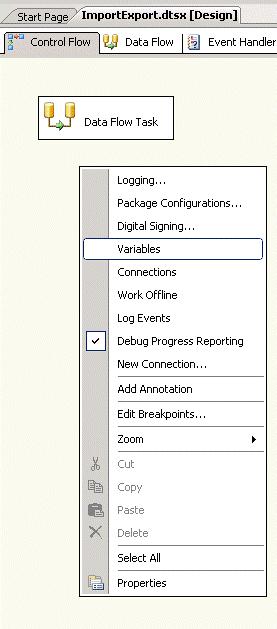
This loads the Variables window which we can use to create a new variable; you can choose the data type and value in the same step (or use the Properties window). In this example I eventually set the value of the variable OutputFolder to “D:\” type String. If we want the file to go somewhere else, we just need to return to this dialogue and put in the new value.
Although I haven't done so here, we can also make the file name a variable. Now we can continue. We need to create a File Connection to the renamed file. Right-click inside the Connection Managers area and choose New File Connection… 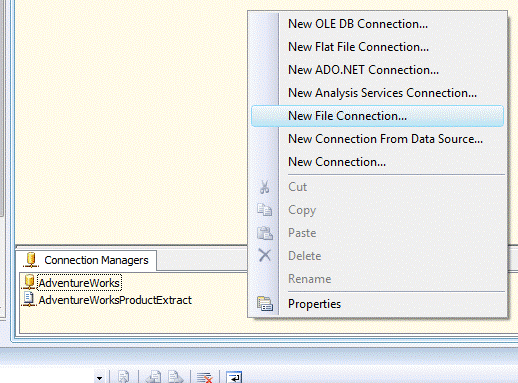
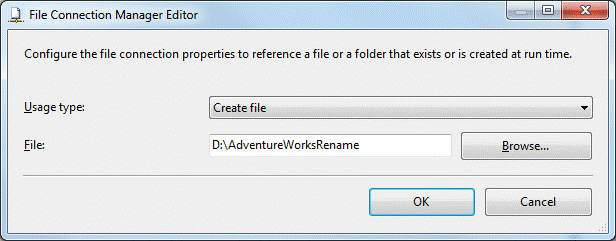
You should get the File Connection Manager editor. Change the usage to ‘Create file’ – don’t worry about the actual filename – we’ll be sorting that out in a moment. For now, just put in a placeholder.
Now the “interesting” bit. This is how we make the file renaming dynamic. Right-click on the AdventureWorksRename connection manager and choose Properties. Click on the ellipsis in the Expressions property. In the Property Expressions Editor choose ConnectionString.
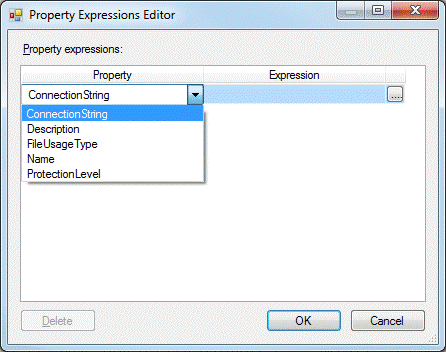
Then click on the ellipsis next to that to enter the actual expression. You can click on the Evaluate Expression button to see what the expression comes to. 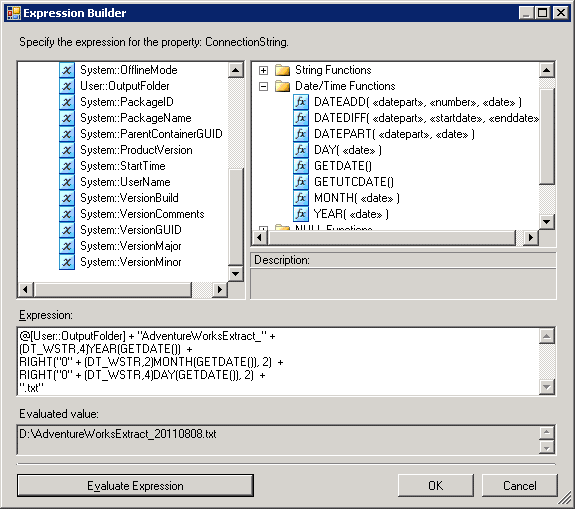
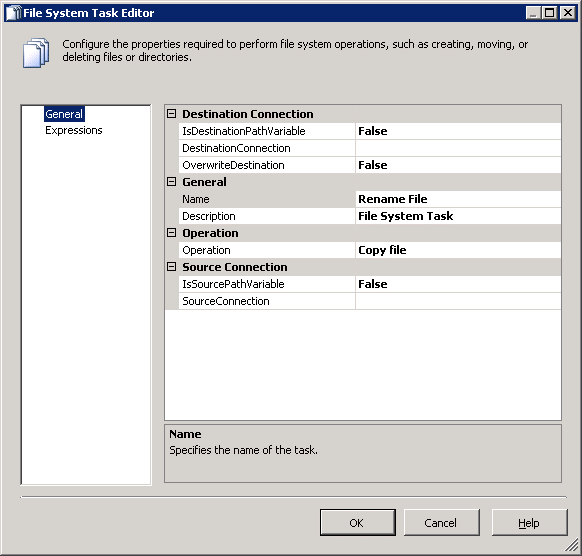
Note how the variable we created earlier is used in the expression with the other date functions to create a filename. Click OK. Click OK in the Property Expression Editor. In the Control Flow, drag a File System Task onto the surface. Double-click on it. Change the operation Name property to ‘Rename file’, and drop the operation list down to ‘Rename file’. Change the DestinationConnection property to the file connection manager of the file being renamed – in this case AdventureWorksRename. And set the SourceConnection to the file being written by the data extract: AdventureWorksProductExtract.
The last bit is to add a ‘success’ workflow link between the data flow task and the rename file task.
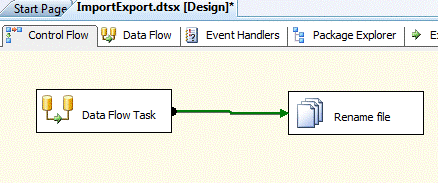
Now when the package is executed, the file is renamed as well.
Job done! 
Not so fast… In Part 2 we'll examine how this package can be made more portable and easier to deploy. We'll see how we can solve the first limitation I mentioned above regarding server and logins.
 ASP.Net
 BlogEngine.NET
 Azure DevOps